How to Choose the Right Overhead Crane for Mold Lifting
Are you responsible for selecting the right lifting equipment for mold changes in your injection molding plant? This guide helps buyers avoid common mistakes and choose a safe, efficient overhead crane system tailored to real workshop needs.
Why This Guide Matters
If you're working in an injection molding workshop, you already know that moving molds isn't just about lifting something heavy. It's about doing it safely, quickly, and without damaging expensive tools or interrupting production.
That’s why getting the right overhead crane matters more than most people think.
Mold Handling Isn’t Just Lifting—It’s Part of the Workflow
Mold changes are a regular part of daily operations. Some shops do it once a week, others every few hours. If your crane is slow, clunky, or unsafe, you’re going to feel it in your downtime, labor cost, and even in the risk of mold damage.
- Many injection molds weigh between 2 to 20 tons.
- They often need to be lifted straight up, aligned perfectly, and lowered into tight spots.
- Some workshops deal with limited ceiling height, narrow aisles, and machines packed side by side.
The wrong crane setup? It slows everything down and increases risk.
What Happens If You Get the Crane Wrong
It’s not just about load capacity. Choosing a crane that’s too basic, too oversized, or simply not built for mold work can lead to:
- Unnecessary wear and tear on the crane and rigging
- Safety issues for your operators during mold changeovers
- Awkward installations that interfere with your workflow or take up too much space
- Costly maintenance or modification needs just months after purchase
These problems can be avoided with the right information before you buy—not after.
Who This Guide Is For
This guide was written for people responsible for selecting, sourcing, or approving workshop cranes:
- Purchasers who need to compare crane specs and supplier offers confidently
- Production or maintenance engineers who know how the mold change process works and want the crane to match it
- Plant managers who are thinking ahead—planning for better uptime and long-term use
Whether you’re buying a mold handling hoist and crane equipment for a new facility or replacing an old one, this guide will help you ask the right questions, understand your needs better, and make a decision that works on the workshop floor—not just on paper.
Step One: Understand Your Mold Lifting Needs
Before you dive into crane types and technical specs, take a step back.
The most important part of choosing the right overhead crane is understanding what it actually needs to do in your workshop.
This isn’t about guessing the load or picking a random tonnage—it’s about matching the crane to your exact lifting routine, environment, and molds.
Know Your Mold Sizes and Weights
Start by reviewing the molds you use—or plan to use—in your production line.
- What is the heaviest mold you need to lift?
- What’s the lightest?
- Do your molds have even weight distribution, or are some longer and need two lifting points?
Most injection molding facilities work with molds ranging from 5 to 20 tons, but some go much heavier. And remember: it’s not just about the maximum load—the average weight and shape also affect the crane choice.
Don’t forget to factor in:
- Mold dimensions (length × width × height)
- Any overhanging parts or asymmetrical shapes
- How the mold is lifted—does it have fixed lifting eyes, slots for hooks, or need slings?
Understand How Often You Lift
Crane duty cycles aren’t just technical terms—they reflect your real operations.
- Do you change molds once a week, once a day, or several times per shift?
- Is the crane used just for mold lifting, or does it also handle other equipment or machine parts?
If mold changes happen frequently, you’ll need a higher-duty crane with reliable motor cooling, better control systems, and durable brakes.
Frequent use also means your operators need fast, smooth, and repeatable control, not jerky motions that waste time or risk damage.
Measure Your Space and Look for Obstructions
Don’t assume the crane will fit—measure first.
Some workshops have limited headroom due to lighting, HVAC systems, cable trays, or sprinkler lines. Others are crowded with molding machines placed close together, leaving tight aisle space for crane travel.
Make sure you measure and note:
- Ceiling height (from floor to lowest obstruction)
- Clear span between walls or support columns
- Distance between molding machines
- Any walkways or platforms that the crane must avoid
Your crane supplier needs these dimensions to recommend the correct beam design, hoist type, and installation method.
Decide How Precise the Lift Needs to Be
Not all mold lifts are equal. Some molds can be placed with simple hoist control. Others need fine-tuned positioning.
- Do you need the hook to stay centered and steady while positioning the mold?
- Are there cases where the mold must be aligned with tight guide pins during insertion?
- Do you handle long molds that require dual-hook or synchronized lifting to avoid tipping?
For these scenarios, a double-speed or inverter-controlled hoist will help. If molds are long, a double trolley or twin-hook setup may be necessary for balance and safe placement.
Create a Mold Lifting Checklist
A practical way to avoid mistakes is to write everything down.
At minimum, your checklist should include:
- Mold types and weights (min, max, average)
- Mold lifting points (centered, dual-point, side hooks, etc.)
- Ceiling height and any obstacles
- Frequency of mold changes
- Required positioning precision
You can also add photos of your molding machines and molds, or even a sketch of your workshop. This makes it much easier to explain your needs to crane suppliers and get realistic proposals—not just catalog recommendations.
Matching Crane Types to Your Workshop Needs
Once you understand your lifting requirements, it’s time to look at the crane options that actually work in your space.
Not all overhead cranes are built the same. The crane that works in a large automotive press shop might be completely wrong for a compact injection molding workshop. Here, you need a crane that fits into your production layout and supports your mold change routines—without wasting space, height, or time.
Let’s break down the main options and when each type makes the most sense.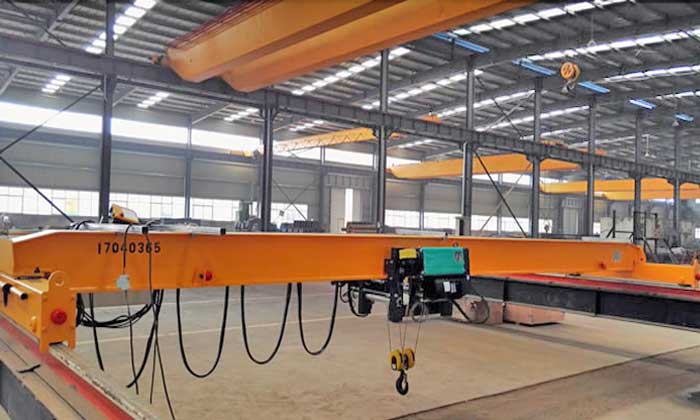
If your molds are mostly below 10 tons and you’re working with moderate ceiling height, a single girder crane might be all you need. These are often more cost-effective, easier to install, and work well in straightforward setups.
Best for:
- Light to medium-duty mold lifting (up to 10 tons)
- Low-frequency mold changes
- Workshops where budget and simplicity matter
Things to consider:
- Hook approach is usually wider than on double girder cranes (you lose a bit of coverage near walls)
- Lifting height is limited, which could be a problem in tight spaces
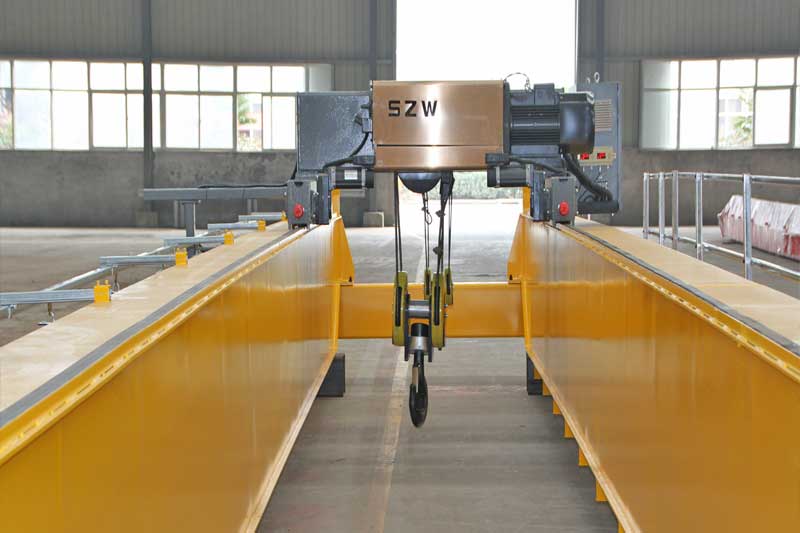
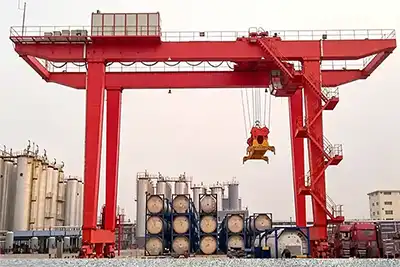
If your molds are heavy or lifted often, a double girder design offers the strength, stability, and lifting height needed for reliable operation over time. These cranes are ideal for serious mold-handling operations.
Best for:
- Heavier molds (10 to 50 tons or more)
- High-frequency mold changes—daily or per shift
- Applications requiring better hook travel and high precision
Things to consider:
- Requires more headroom and stronger support structure
- Generally higher upfront cost—but pays off in long-term performance

This type of crane is designed specifically for workshops with height restrictions. Instead of hanging the hoist below the beam, the hoist is placed beside or integrated with it, saving vertical space.
Best for:
- Workshops with low ceilings
- Retrofits into older buildings with minimal clearance
- Mold lifts that need maximum vertical travel in a compact area
Things to consider:
- Not suitable for extremely heavy molds
- Verify how much true lifting height you gain with this option
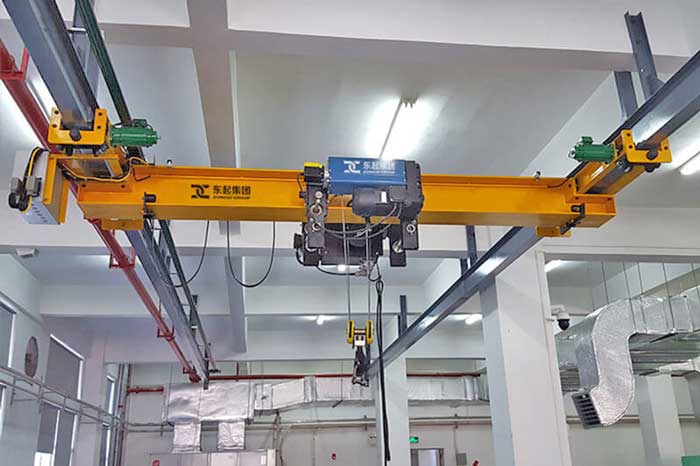
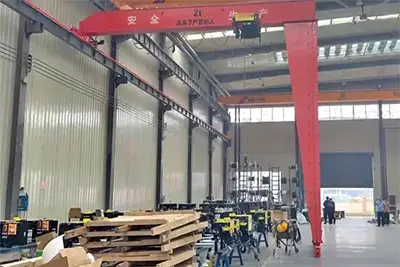
Underrunning (Suspension) Crane
An underrunning crane runs on tracks fixed to the bottom flange of your building’s ceiling structure or runway beams. It’s useful where floor space is limited, and where overhead obstructions are minimal.
Best for:
- Lightweight mold handling
- Short spans and tight workshop layouts
- Facilities where floor-mounted columns are not feasible
Things to consider:
- Limited lifting capacity (generally up to 10 tons)
- Needs a strong roof structure or custom support frame
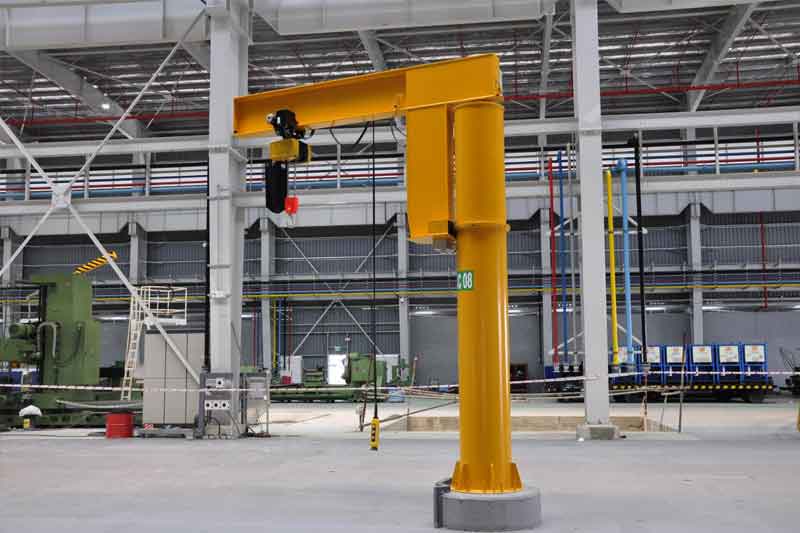
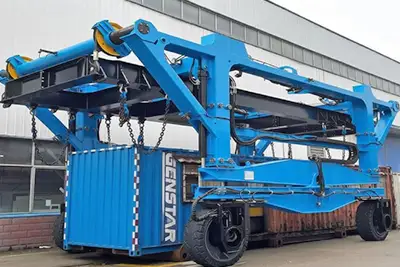
Sometimes, the main crane isn’t enough—especially when you want to lift molds next to a specific injection machine without moving the mold far. In these cases, a pillar-mounted or wall-mounted jib crane can provide quick and local lifting support.
Best for:
- Mold changes directly at machine stations
- Workstations where quick access is more important than travel distance
- Secondary support where overhead crane use is limited
Things to consider:
- Rotation range and height need to be planned carefully
- May require structural reinforcements if mounted on a wall or floor
What You Should Do Before Choosing
No matter what type you're leaning toward, don’t choose in isolation. The crane needs to fit into your building, your machines, and your daily process.
Before making a final decision:
- Share your workshop layout with the supplier
- Include ceiling height, machine arrangement, and obstacle locations
- Ask for custom drawings or lifting simulations, not just standard models
A good supplier will evaluate your actual workspace—not just push a generic crane model—and help you choose a setup that works day in and day out.
| Crane Type | Ideal For |
|---|---|
| Single Girder Crane | Lighter molds (under 10 tons), basic lifting tasks |
| Double Girder Crane | Heavier molds (10–50 tons), high-frequency, accurate lifts |
| Low-Headroom Crane | Low ceilings or compact workshop environments |
| Underrunning Crane | Limited space, short spans, and lighter loads |
| Jib Crane (Add-on) | Localized lifting beside injection machines |
Ask your supplier to assess your workshop layout to recommend the most practical crane type.
Key Crane Specifications to Evaluate
Once you’ve narrowed down the crane types that match your workshop, it’s time to get into the technical side—the specifications. These are the details suppliers will include in their quotations, and the ones you should compare carefully.
But don’t just look at numbers. Ask yourself: "Does this spec match how we actually use the crane?"
If it doesn’t, it may cost you later in downtime, modifications, or even safety issues.
Let’s go through the key specifications every smart buyer should double-check.
Rated Lifting Capacity
This is the first number you’ll see in any crane offer. But don’t just look at your current mold weights—think ahead.
- Choose a crane that handles your heaviest mold with a margin of 20–30% for safety.
- If your heaviest mold is 10 tons, consider a 15-ton crane—not 10T flat.
- Will your plant add bigger machines in 1–2 years? If so, don’t box yourself in now with a crane that will be undersized later.
Also remember: rated capacity includes the weight of the lifting attachments, not just the mold itself.
Span and Lifting Height
This defines the crane’s coverage—how far it can reach, and how high it can lift.
Span is the horizontal width between rails or columns. It must cover the working area between machines or bays.
Lifting height is the vertical distance the hook can travel. It needs to be high enough to:
- Clear the top of machines or doors
- Lift molds straight up before moving
- Allow safe rigging and unrigging
Ask the supplier to calculate the effective hook height, not just theoretical numbers—especially important if you're working in low-clearance buildings.
Hoisting and Travel Speeds
Different operations need different speeds.
Single-speed hoists are simple and cheaper but harder to control precisely.
Dual-speed or inverter-controlled systems allow:
- Fast travel during long moves
- Slow speed for final positioning during mold installation
- Smooth acceleration and braking, which protects both mold and machine
If you’re handling delicate molds or aligning with tight guide pins, precise control saves time and reduces risk.
Hook Approach (Side and End)
Hook approach is how close the hook can get to a wall or obstruction—crucial when space is tight.
- Some cranes leave large gaps between the hook and beam edge (poor end approach)
- Others have compact trolley designs that let the hook reach closer to the mold centerline, even in narrow aisles
Check both side approach (perpendicular to crane runway) and end approach (parallel to crane travel). Poor hook approach means wasted space and extra maneuvering.
Load Positioning Accuracy
When lifting molds, especially heavier ones, fine positioning is a must. Even a few centimeters off can damage guide pins or misalign mold bases.
- Look for cranes with inverter-controlled hoisting and travel, which offer better responsiveness.
- Some advanced systems include anti-sway control, keeping the load stable while moving.
- If your molds are long or unbalanced, consider dual hoists or synchronized lifting systems for even load control.
Ask for load positioning accuracy reports or performance charts if possible—not just specs on paper.
Safety Features That Matter
A well-built crane for mold handling isn’t just about lifting—it’s about lifting safely and predictably.
Essential safety features to look for:
- Upper and lower limit switches to prevent over-travel
- Overload protection devices
- Emergency stop buttons accessible from pendant or radio remote
- Anti-sway control (especially useful when operators are not highly skilled)
- Brake redundancy for both hoisting and travel motors
- Thermal protection on motors for high-duty applications
If your crane will be used frequently, make sure it’s rated for the duty cycle—and that its components can handle your operating hours without overheating.
Smart Tip for Serious Buyers
When comparing quotes, don’t just accept what the brochure says. Ask suppliers for:
- Load testing records
- Travel and hoisting speed tolerance reports
- Factory inspection certificates
- Photos or videos of similar mold-handling cranes they've delivered
This is especially important if you're purchasing internationally or from a new supplier. It helps confirm that what you're getting is built for workshop use—not just showroom specs.
Rigging Compatibility and Lifting Attachments
A crane alone doesn’t complete the lift.
The rigging—that is, the lifting chains, slings, hooks, beams, and connectors—is what makes the whole system work safely and efficiently. Yet, many buyers focus on the crane specs and completely overlook rigging until the last minute.
Don’t make that mistake.
The wrong rigging setup can slow down your mold changes, damage the load, or even cause a serious safety incident.
Let’s break down what to confirm and discuss with your crane supplier—or rigging equipment provider—before placing your order.
Mold-Compatible Lifting Rings, Chains, and Slings
Not all molds have the same lifting points or attachment methods. Some molds come with threaded lifting holes. Others have fixed eye bolts, side slots, or bottom support brackets. The rigging you use needs to match these designs—and be rated for the weight you're lifting.
What to check and prepare:
- Confirm the size and type of lifting rings or eye bolts on your molds
(Metric or imperial threads? Fixed or removable?) - Choose slings or chains with adequate working load limits (WLL)
Always include a 20–30% safety margin over your heaviest mold. - Check sling angles and lifting geometry
Improper angles can reduce lifting capacity and strain your equipment. - Inspect slings and chains regularly for wear, kinks, and fatigue—especially in a high-frequency environment.
If molds vary in shape and lifting points, keep a set of rigging tools of different lengths and types for flexibility.
Dual-Hook or Synchronized Hoisting Options
Some molds are long, heavy, and not evenly balanced. Lifting these with a single hook can tilt the mold dangerously, causing misalignment or even failure.
That’s where dual-hook or twin-hoist setups come in.
Why this matters:
- Dual hooks allow lifting at two points simultaneously, maintaining balance and control.
- If the crane includes a synchronized hoisting control system, both hooks lift and lower at the same rate, preventing twisting or uneven load distribution.
- This is critical when installing molds with tight tolerances or aligning pins.
You can also ask your supplier whether two trolleys (with one hoist each) or a twin-drum hoist is more appropriate for your mold sizes.
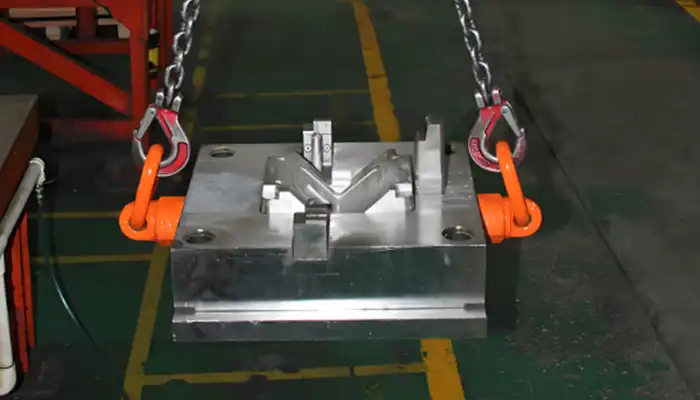
Lifting Beams or Adjustable Spreaders
For awkwardly shaped or wide molds, rigging directly from a single hook can introduce dangerous lifting angles.
That’s where lifting beams (also called spreader beams or cross beams) help. These devices connect to the crane hook and provide multiple lifting points at fixed or adjustable spacing.
Key advantages:
- Keeps lifting forces vertical and evenly distributed
- Reduces risk of slings slipping or bending the mold frame
- Can be custom-sized to your mold range
- Available with swivel hooks, shackles, or chain slots for easy attachment
Tell your supplier the typical mold lengths and lifting hole locations, so they can recommend or design the right beam for you.
Quick-Release or Easy-Rig Hooks
If you're doing frequent mold changes, speed matters. The longer your team spends hooking and unhooking a mold, the more downtime you're stacking up.
Solutions to consider:
- Quick-release hooks or latch hooks allow your operator to rig and release without special tools
- Magnetic sling holders or rigging trays can reduce setup time between lifts
- Color-coded sling sets help prevent mix-ups during high-volume operations
Even small rigging time savings can add up—especially in shift-based production where molds are changed several times per day.
Don’t Overlook the Importance of Rigging
Many crane-related accidents don’t come from crane failure—they come from improper rigging practices, worn-out slings, or unstable loads.
That’s why it’s worth spending a bit more time on:
- Reviewing your mold lifting points
- Taking a photo inventory of different mold sizes
- Asking your crane supplier if they offer a rigging compatibility review
- Ensuring your operators are trained not just on crane use—but also safe rigging techniques
If your crane works perfectly but your rigging doesn’t match, the whole system fails.
Power Supply and Installation Factors
A crane isn’t a plug-and-play machine. Before installation, you need to make sure your building’s layout, electrical system, and structural conditions are ready to support it.Skipping these checks can lead to delays, extra costs, or even having to rework your facility. This section walks you through what to confirm early—and what to share with your crane supplier during the inquiry stage.
Electrical Supply: Know Your Power
Every crane requires a stable and suitable electrical supply. If the voltage or frequency doesn’t match what the crane was designed for, it simply won’t run—or worse, it could get damaged.
What to check before buying:
- Voltage level: Common values are 380V, 415V, or 460V. Some workshops use 220V for light cranes.
- Frequency: Most countries use either 50Hz or 60Hz. Make sure the crane motors and inverter drives match.
- Phase: Industrial overhead cranes almost always require three-phase power.
- Power access point: Is there a power panel near where the crane will run? Will cabling need to be installed?
Let your supplier know this upfront. They can match motor types, design the control panel accordingly, and avoid costly redesigns after manufacturing starts.
Support Structure: How Will the Crane Be Mounted?
Crane installation depends on what kind of support structure your building can provide.
There are two main choices:
- Free-standing gantry or modular overhead systems
These are bolted to the floor and ideal for buildings with no suitable columns. - Column-supported overhead cranes (top-running or underrunning)
These are mounted on existing concrete or steel building columns—or added steel supports.
Points to confirm:
- Is your workshop structure strong enough to carry crane loads?
- Are there anchor points or beams already installed?
- If not, will your supplier offer support columns or brackets?
It’s important to align crane selection with what your building can physically handle.
Watch for Interference and Obstructions
Even the best-designed crane can run into trouble if its path crosses with lights, air ducts, HVAC units, or doorways. These interferences often get missed in early planning.
Do a walkthrough and check for:
- Low-hanging pipes, ducts, or cable trays
- Lighting fixtures or ceiling fans that may be in the crane’s travel zone
- Overhead doors or access areas that may open into the crane path
- Nearby machinery—will it be safe to operate under the crane?
Take photos and make notes. Better yet, include a top-down layout or workshop drawing with your inquiry.
Runway Beam Height and Crane Travel Path
This is where lifting height meets building dimensions.
The runway beam height defines how high the crane runs above the ground. This affects:
- Clearance for loads to pass underneath
- Maximum lifting height from hook to floor
- Compatibility with existing machines, mezzanines, or ventilation systems
Also consider how long the crane needs to travel:
- Will it move the full length of the building?
- Is it restricted to a smaller bay or workstation?
- Do you need an end stop or limit switch to prevent collisions?
Discuss all of this with your supplier—they can recommend rail length, beam height, and trolley type based on the layout.
Pro Tip: Share Your Workshop Layout Early
One of the best things you can do during the crane inquiry process is provide a simple drawing or sketch of your workshop. It doesn’t have to be perfect—just accurate.
Include:
- Machine positions
- Mold storage areas
- Doors and walkways
- Ceiling height at different points
- Electrical access locations
This helps your supplier propose a tailored design that actually fits your space, rather than offering a one-size-fits-all crane.
How to Select the Right Crane Supplier
Choosing the crane is only half the job. Choosing who supplies it can make or break your project—especially in the injection molding sector, where precision, reliability, and downtime control are everything.There are dozens of crane manufacturers and traders out there. But not all of them understand the specific demands of mold lifting, let alone how to tailor a solution to fit your space and workflow.Here’s how to narrow your list and find a supplier you can trust—whether you’re a plant manager replacing aging cranes, or a sourcing officer buying for a new facility.
Ask About Experience with Mold Lifting Applications
A supplier who has never worked with mold-handling clients will likely sell you a general-purpose crane—and leave you to figure out the rest. That’s not what you want.
What to ask:
- Have they delivered cranes for injection molding workshops before?
- Can they show real cases—photos, videos, client references?
- Do they understand mold-lifting details like dual-hook hoisting, low headroom designs, or quick-change operations?
Experience matters. Suppliers who’ve served clients like you will ask smarter questions—and give you more useful recommendations from the start.
Look for Tailored Solutions, Not Just Catalog Products
Some suppliers will push whatever model is in stock or fits their catalog, even if it doesn’t match your layout or lifting process. That’s a red flag.
A reliable crane supplier should:
- Review your workshop layout and mold handling process
- Offer custom beam lengths, lifting heights, and hook approaches
- Suggest add-ons like adjustable lifting beams or dual-speed controls
- Be willing to adapt the design, not just sell what’s convenient
If they send a quotation within 10 minutes with no technical questions, you’re probably dealing with a trading company, not a true crane builder.
Verify Certifications and Inspection Reports
In mold handling, precision and safety are non-negotiable. Make sure your supplier builds cranes that meet recognized standards.
Check for:
- CE and ISO certifications for mechanical and electrical compliance
- Third-party inspection reports for critical components (like hoists, motors, and gearboxes)
- Factory load test videos or reports showing actual lifting capacity and performance
Request these documents as part of the quotation package. If they hesitate or send vague files—move on.
Ask About Installation Support and After-Sales Service
Buying the crane is just the beginning. Installation, commissioning, and long-term use matter just as much.
Confirm the following:
- Do they offer installation drawings and wiring diagrams tailored to your site?
- Will they support your team remotely during installation?
- Is there a clear spare parts policy with lead times and warranty terms?
- Can you get service help or replacement components 1–2 years down the road?
Even if you plan to install the crane yourself or through a contractor, a good supplier should walk you through the process—not leave you hanging after the sale.
Request Case Studies and Client References
If a supplier has real-world experience in the injection molding industry, they should be able to back it up.
Ask them to share:
- Case studies or photos of cranes installed in injection molding workshops
- Contact info for past clients (if allowed) for reference checks
- Videos of cranes in operation—especially during mold changing processes
This not only confirms their experience but gives you ideas for your own setup.
Final Tip: Take the Time to Ask Hard Questions
Don’t rush your decision. A crane is a long-term investment—and poor choices can mean years of operational headaches.Talk to at least two or three suppliers. Compare not just price, but how well they understand your needs, how detailed their proposal is, and how committed they are to supporting you.You’ll often find that the cheapest offer isn’t the best value—especially if it lacks the precision, support, and documentation that injection molding operations demand.
Final Takeaways for Buyers
Choosing the right overhead crane isn’t just about picking the cheapest model or the one with the highest lifting capacity. It’s about finding a crane that fits your exact mold types, workshop layout, and daily lifting routines.Every injection molding workshop has its own quirks. Maybe you have unusually large molds, or a low ceiling height, or frequent mold changes that demand fast, precise handling. Your crane needs to work with these realities, not against them.
Prioritize Safety and Precision Over Price
It’s tempting to focus on the price tag—especially when budgets are tight. But a crane that isn’t precise, reliable, or safe will cost you far more in downtime, repairs, and even workplace accidents.
Make sure the crane you select has:
- Proven safety features like overload protection and emergency stops
- The lifting accuracy to position molds exactly where needed
- Rigging options that match your molds and minimize load swing
These factors don’t just protect your operators—they keep your production line running smoothly.
Clarify Crane Features and Rigging Needs Early
Before you say “yes” to any supplier, double-check that every feature you need is on the specs list. And don’t forget about rigging tools!
Ask yourself:
- Does the crane have the right hook arrangement for your mold shapes?
- Will dual-hook or synchronized lifting be necessary?
- Are quick-release hooks or adjustable spreaders included or optional?
A mismatch here can cause costly delays or force you to buy additional rigging equipment later.
The Right Crane Saves Time and Money Long-Term
A crane that’s designed to fit your workflow will make mold changes faster, safer, and less stressful for your operators.You’ll see fewer unplanned stoppages, less wear and tear on equipment, and better overall productivity.Investing a little extra time in upfront planning and supplier discussions pays off in fewer headaches down the road.
Ready to Find Your Best Crane?If you’re ready to take the next step, gather your mold inventory list, a simple layout drawing of your workshop, and a summary of your lifting needs.Send these to your crane supplier—this information helps them create a solution tailored to your plant, not just a generic product.